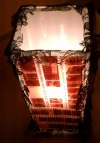
Last summer, I spent a lot of my time with my Diana F+ lomo camera. (I absolutely love lomography!) Countless rolls of films left me with not only photographs that captured all of my hikes, road trips, vacations, you name it, in the most trendy way possible — before Instagram became the go-to photography phone app it is now, but I was also left with negatives. Rolls and rolls of them.
So instead of let them pile up on my dresser, I knew I had to do something creative with them. Besides, how awesome is it to say that you created something new from the leftovers of another creative project? Recycling at its finest. Plus, you’re viewing your photos in a new light.
One used Ikea table lamp, countless strips of film negatives and leftover black lace (from another project) later, a “film-strip lamp” was born. (I can’t even begin to describe my love for black lace. It’s unnatural and a bit unhealthy and has been used in every — and I mean every — project of mine.)
Here we go! This is such an easy, rainy-Sunday-afternoon kind of a project.
Making a Film-Strip Lamp:
What you’ll need:
- Black lace fabric
- Film negatives
- Clear tape
- Table lamp (I used the IKEA GRONO table lamp; find something similar if you can.)
- Scissors
- Hot glue gun + glue sticks

How to do it:
1. If your film is rolled up, cut it into strips, ensuring they are long enough to cover the lamp, from top to bottom.
2. Tape the strips of film onto the lamp. Continue to do this until the entire surface of the lamp is covered.
3. Take your fabric, and cut the lace into strips about an inch-and-a-half thick — the length dependent on the lamp. You’ll need four strips that match the height of the lamp, longways; and you’ll need four for the top and four for the bottom of the lamp.
4. Apply hot glue to the center of each strip, and press onto the lamp.
5. Let the lamp dry. (It shouldn’t take long.)
6. Turn on the lamp, and there you have it! Enjoy. 🙂


